Growing cannabis is a lifestyle and learning how to grow cannabis is a skill every grower must have. We will take you from the essential steps of growing cannabis from the germination phase to drying and curing your buds.
Step 1: Germination
1. Choose High-Quality Seeds
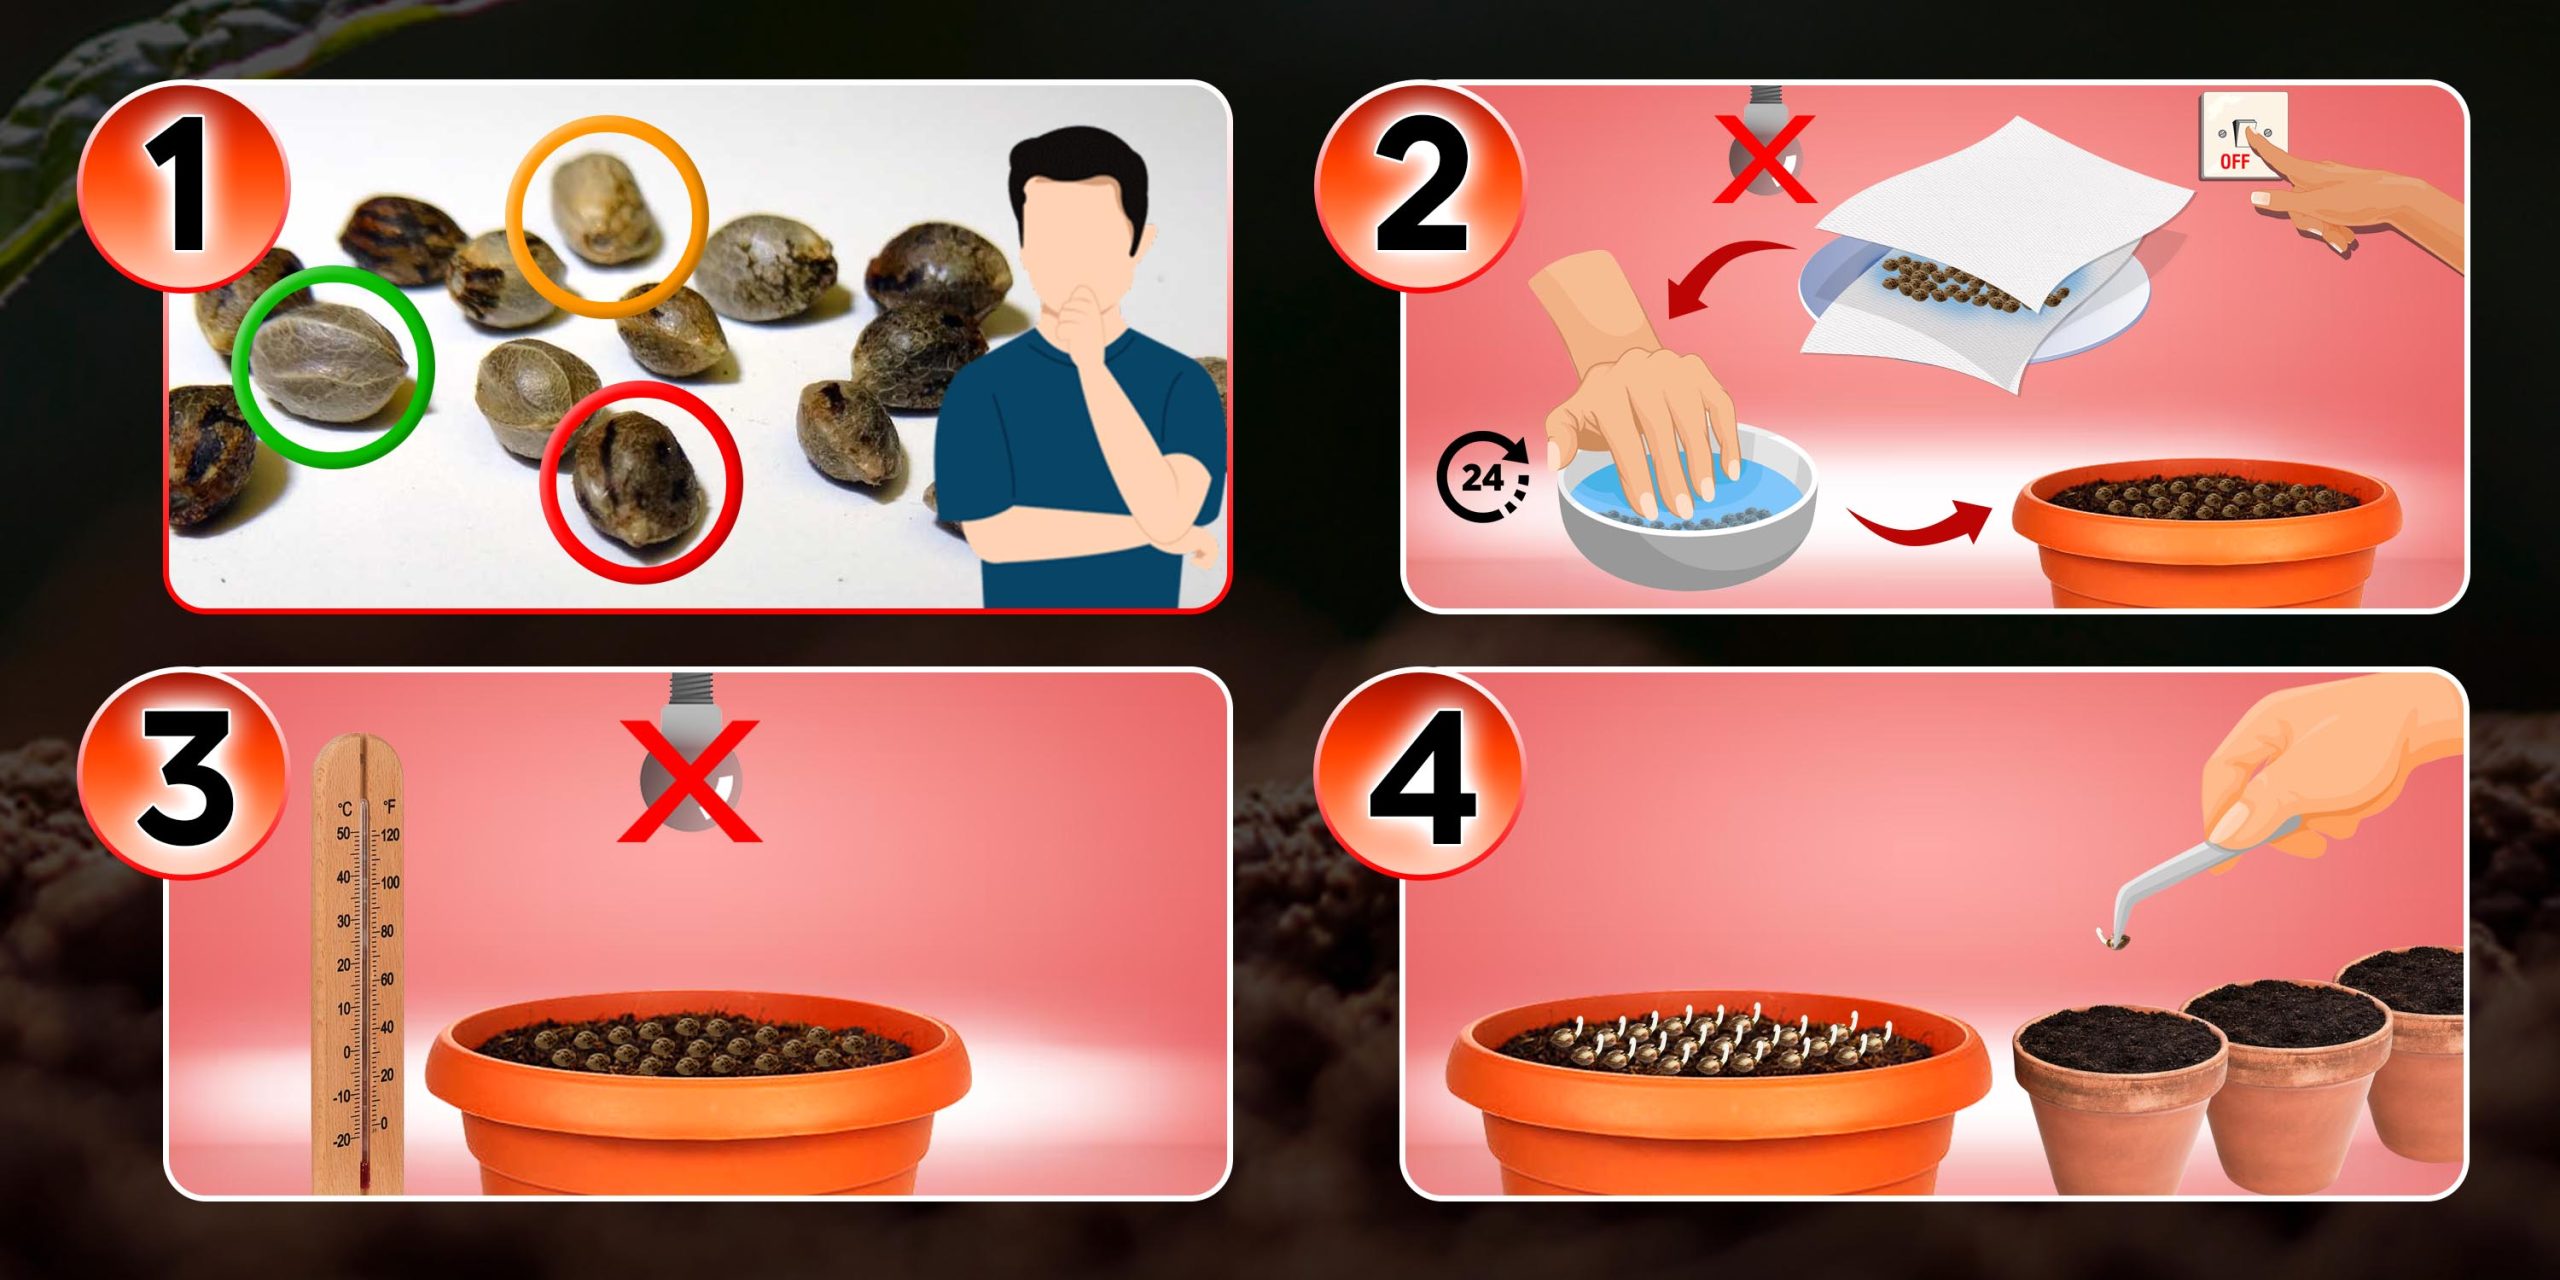
Select healthy, mature seeds—brown, firm, and slightly glossy. These seeds have the highest chance of successful germination.
Shop here for high-quality cannabis seeds
2. Select a Germination Method
Paper Towel Method: Place seeds between two moist paper towels and keep them in a dark, warm place (70-85°F). Check every 24 hours for the taproot to appear.
Soak in Water: Soak seeds in a glass of water for up to 24 hours. Once the seeds sink and crack open, they’re ready to plant.
Direct-to-Soil: Plant seeds about half an inch deep in moist soil. Keep the soil warm and dark until seedlings emerge.
Click here for a more detailed germination method
3. Maintain Optimal Conditions
Temperature: 70-85°F (21-29°C).
Humidity: 70-80%.
Keep the seeds in the dark until they sprout.
4. Monitor for Growth
Once the taproot (small white root) emerges, your seeds can be transferred into your growing medium.
Step 2: Seedling Stage
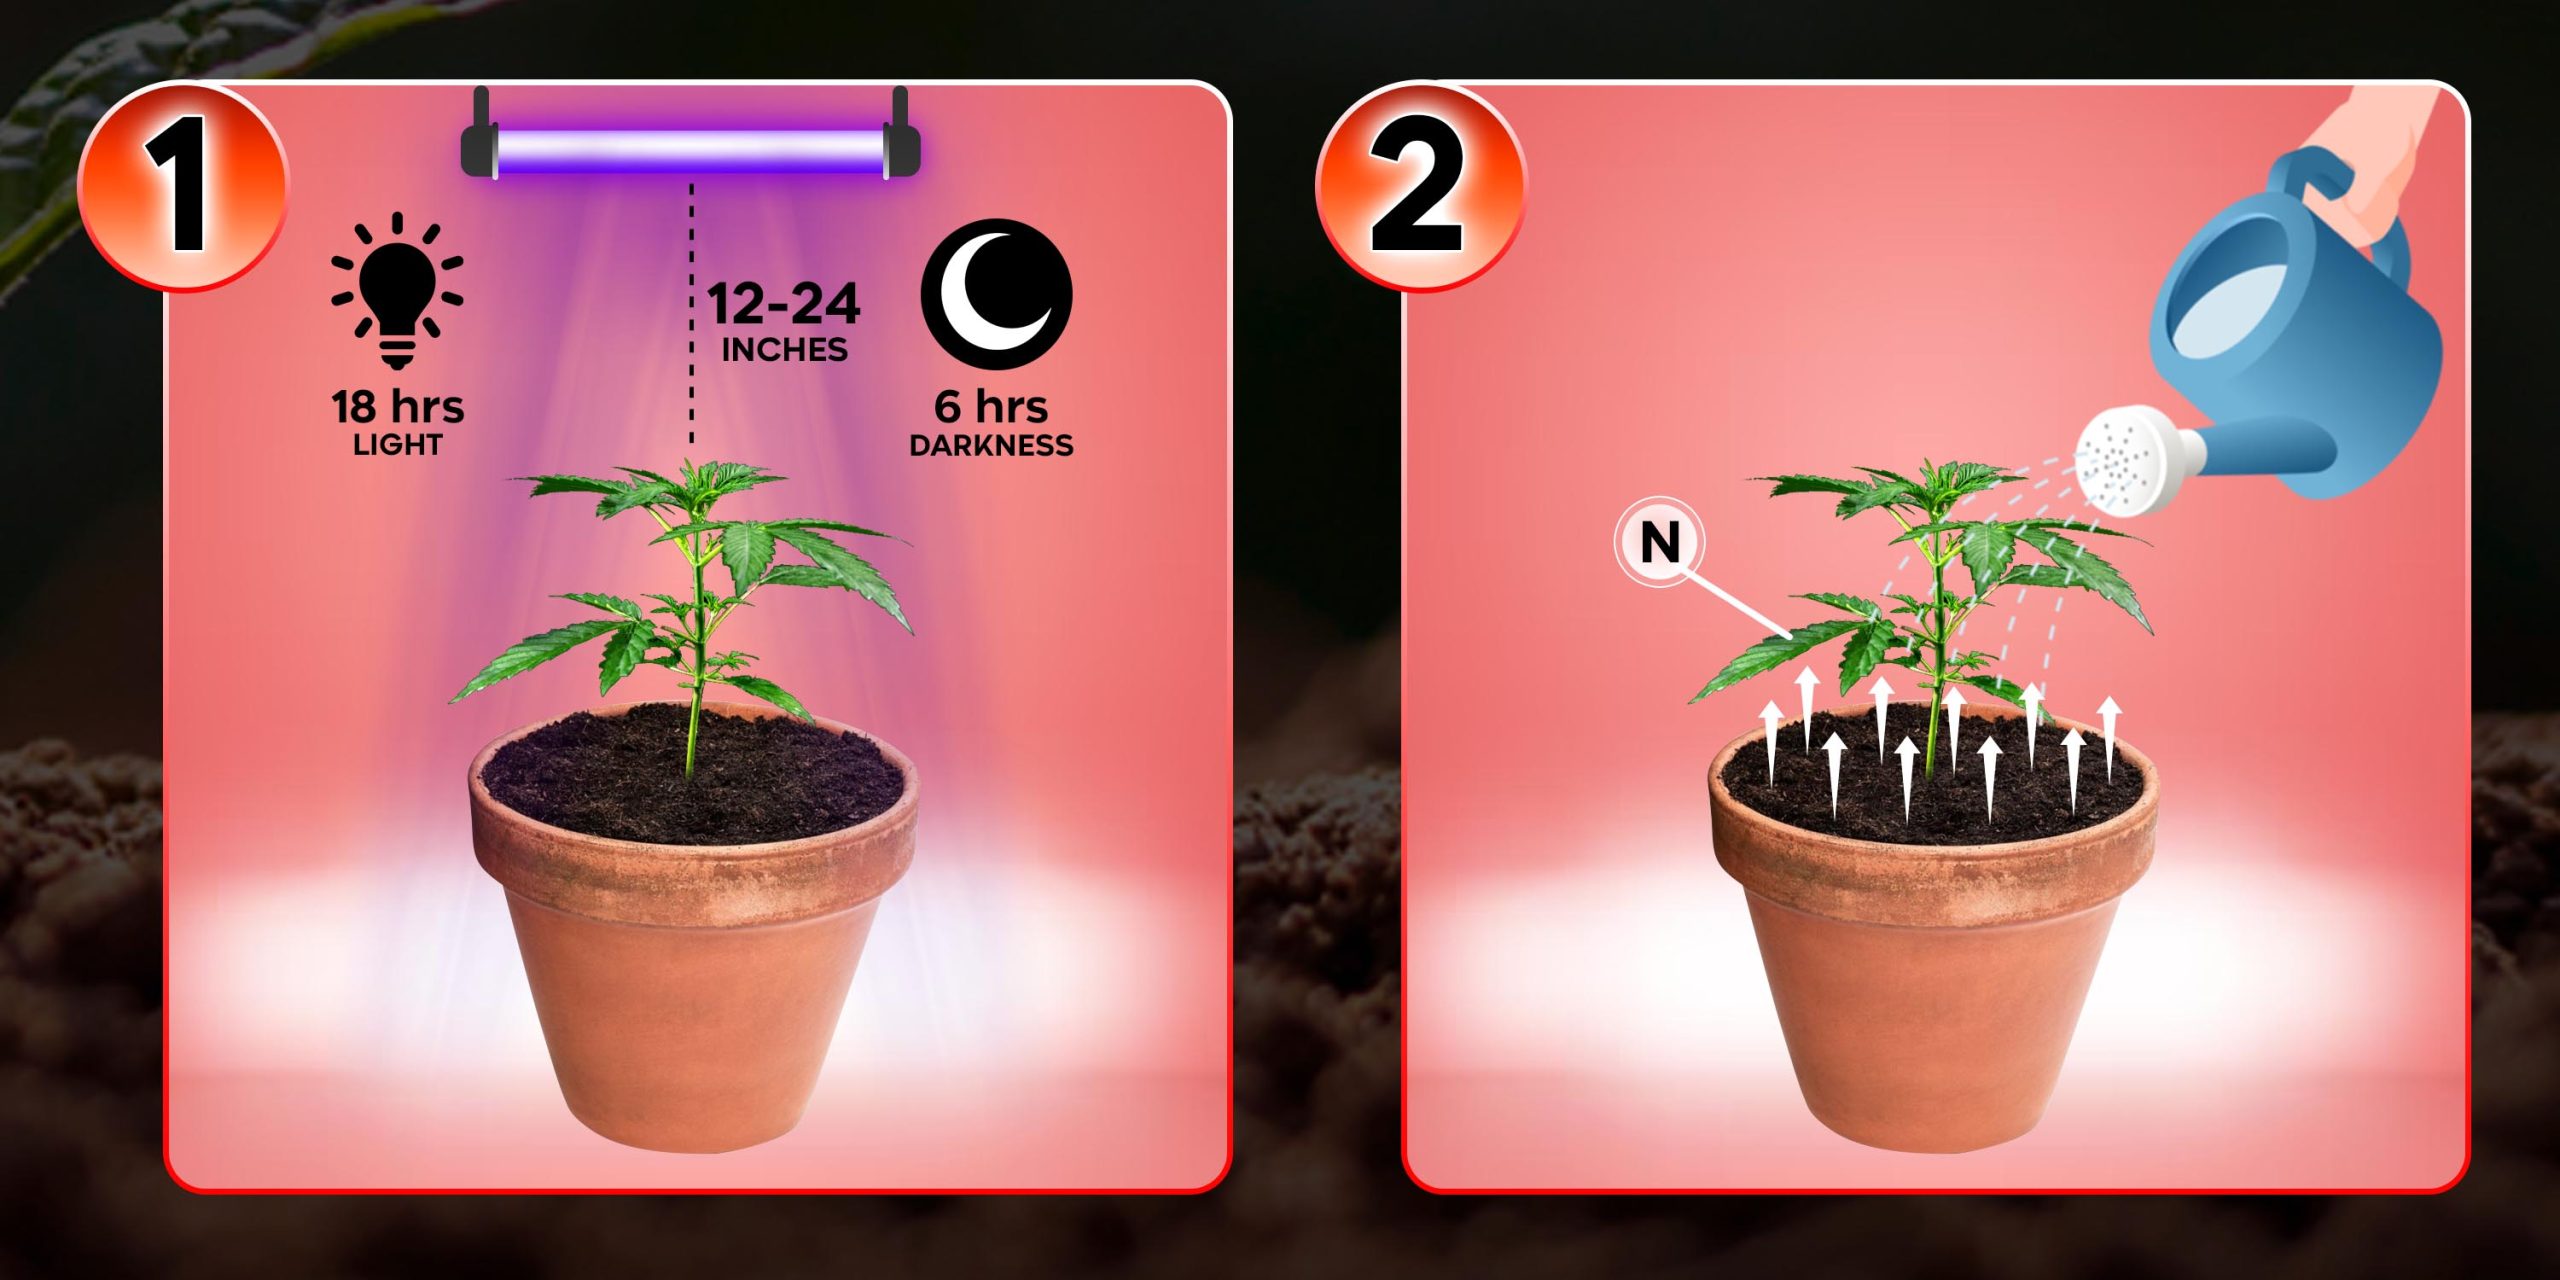
1. Set Up Proper Lighting
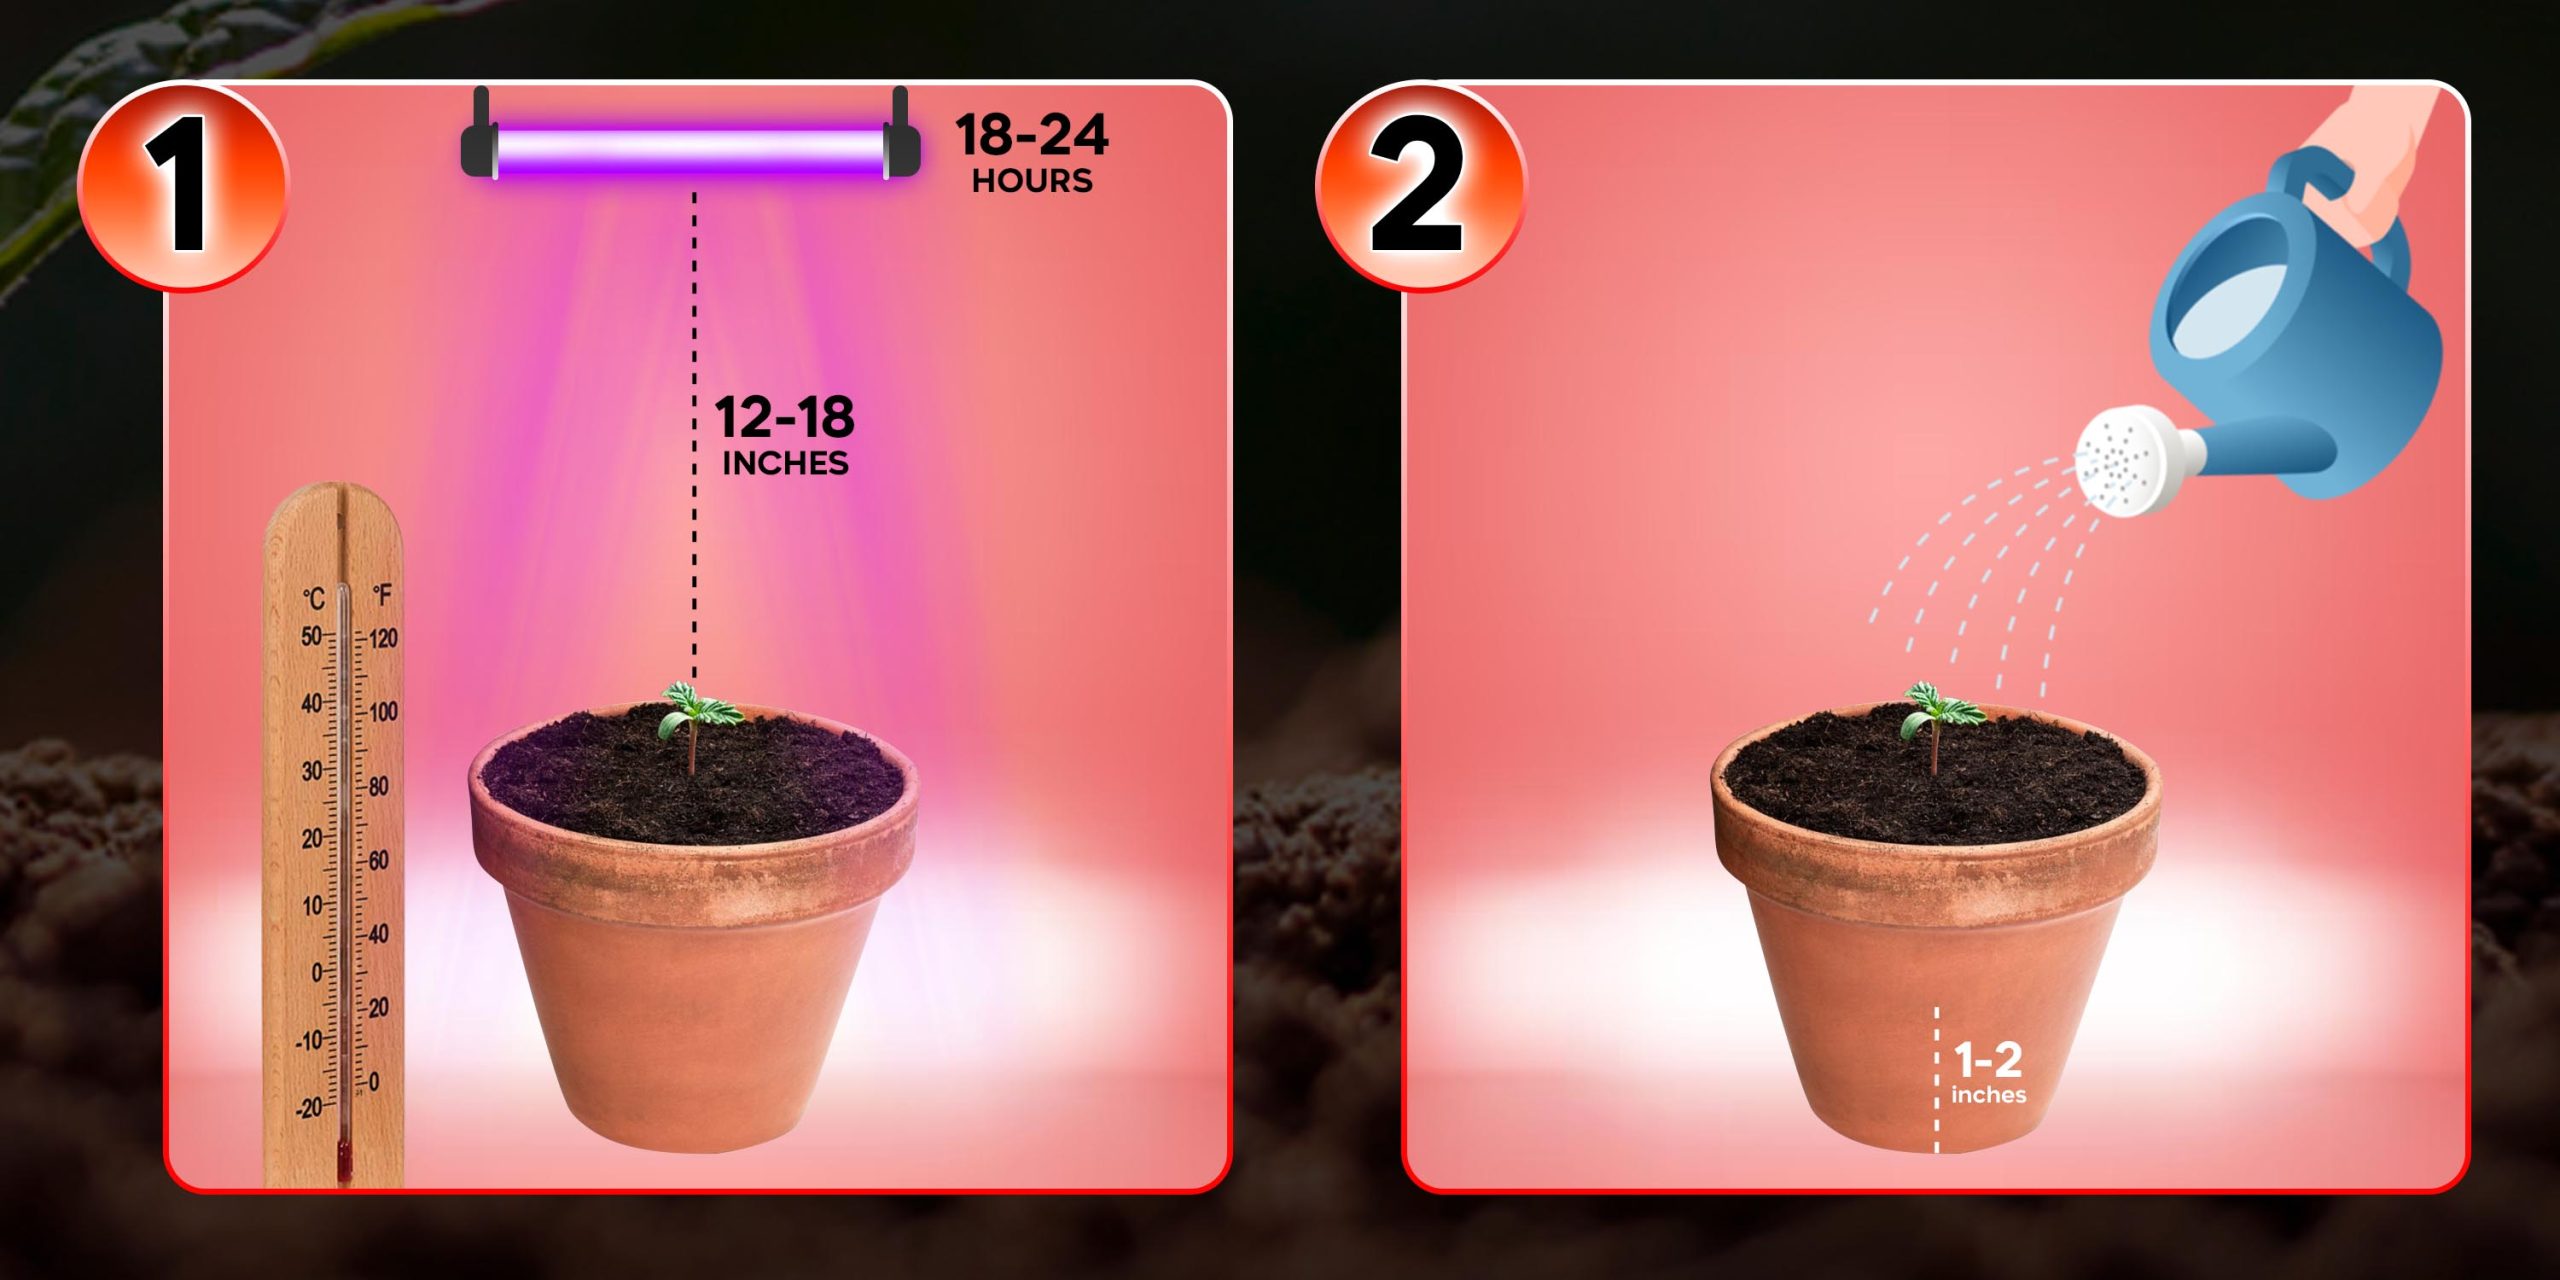
Use CFL or LED grow lights to avoid heat damage. Position lights 12-18 inches above the seedlings.
Provide hours of light per day for optimal growth.
2. Water Seedlings Carefully
Keep the soil moist but not soaked. Overwatering can drown the fragile roots. Water when the top 1-2 inches of soil feel dry.
3. Nourish the Seedlings
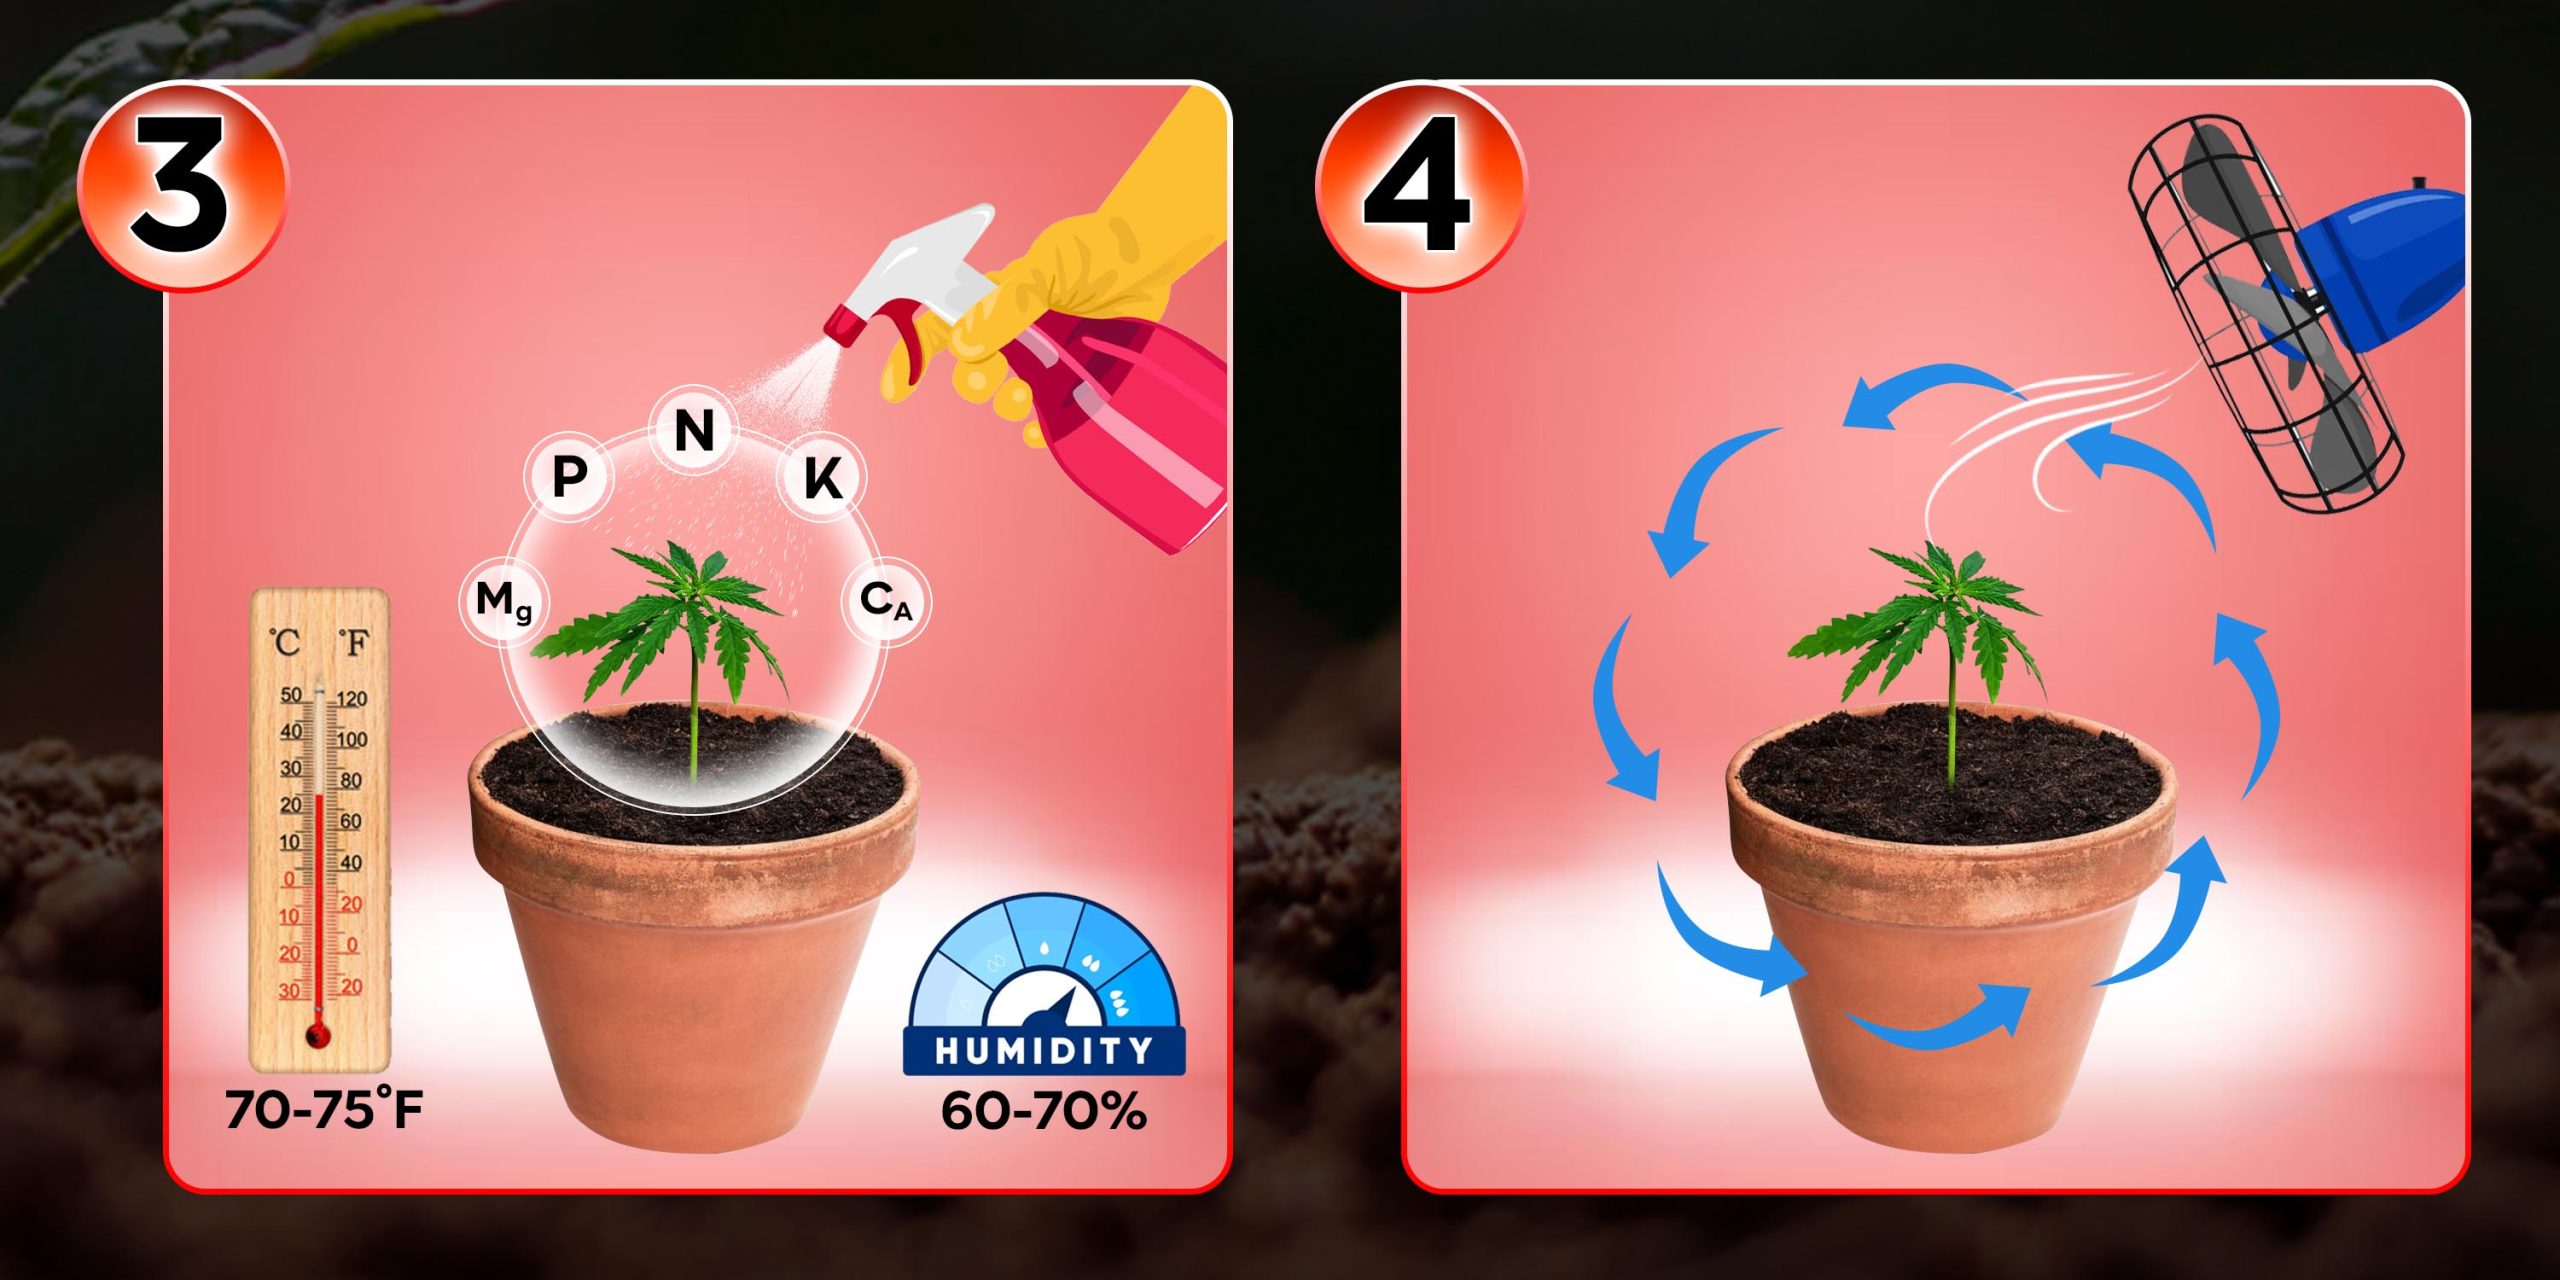
Start feeding nutrients once they develop several true leaves. Begin with a low-strength nitrogen-rich fertilizer.
Maintain a temperature between 70-75°F (21-24°C) and humidity at 60-70%.
4. Keep Air Circulation
Use a small fan to strengthen the stems and prevent mold.
Step 3: Vegetative Stage
1. Increase Light Intensity
Switch to a stronger blue-spectrum light for leafy growth. Keep it 18-24 inches away from the plants.
Use an 18/6 light cycle (18 hours of light, 6 hours of darkness) to promote healthy growth.
2. Water and Feed Regularly
Water more frequently, but allow the soil to dry slightly between watering.
Increase nutrient levels, especially nitrogen, to support leaf and stem development.
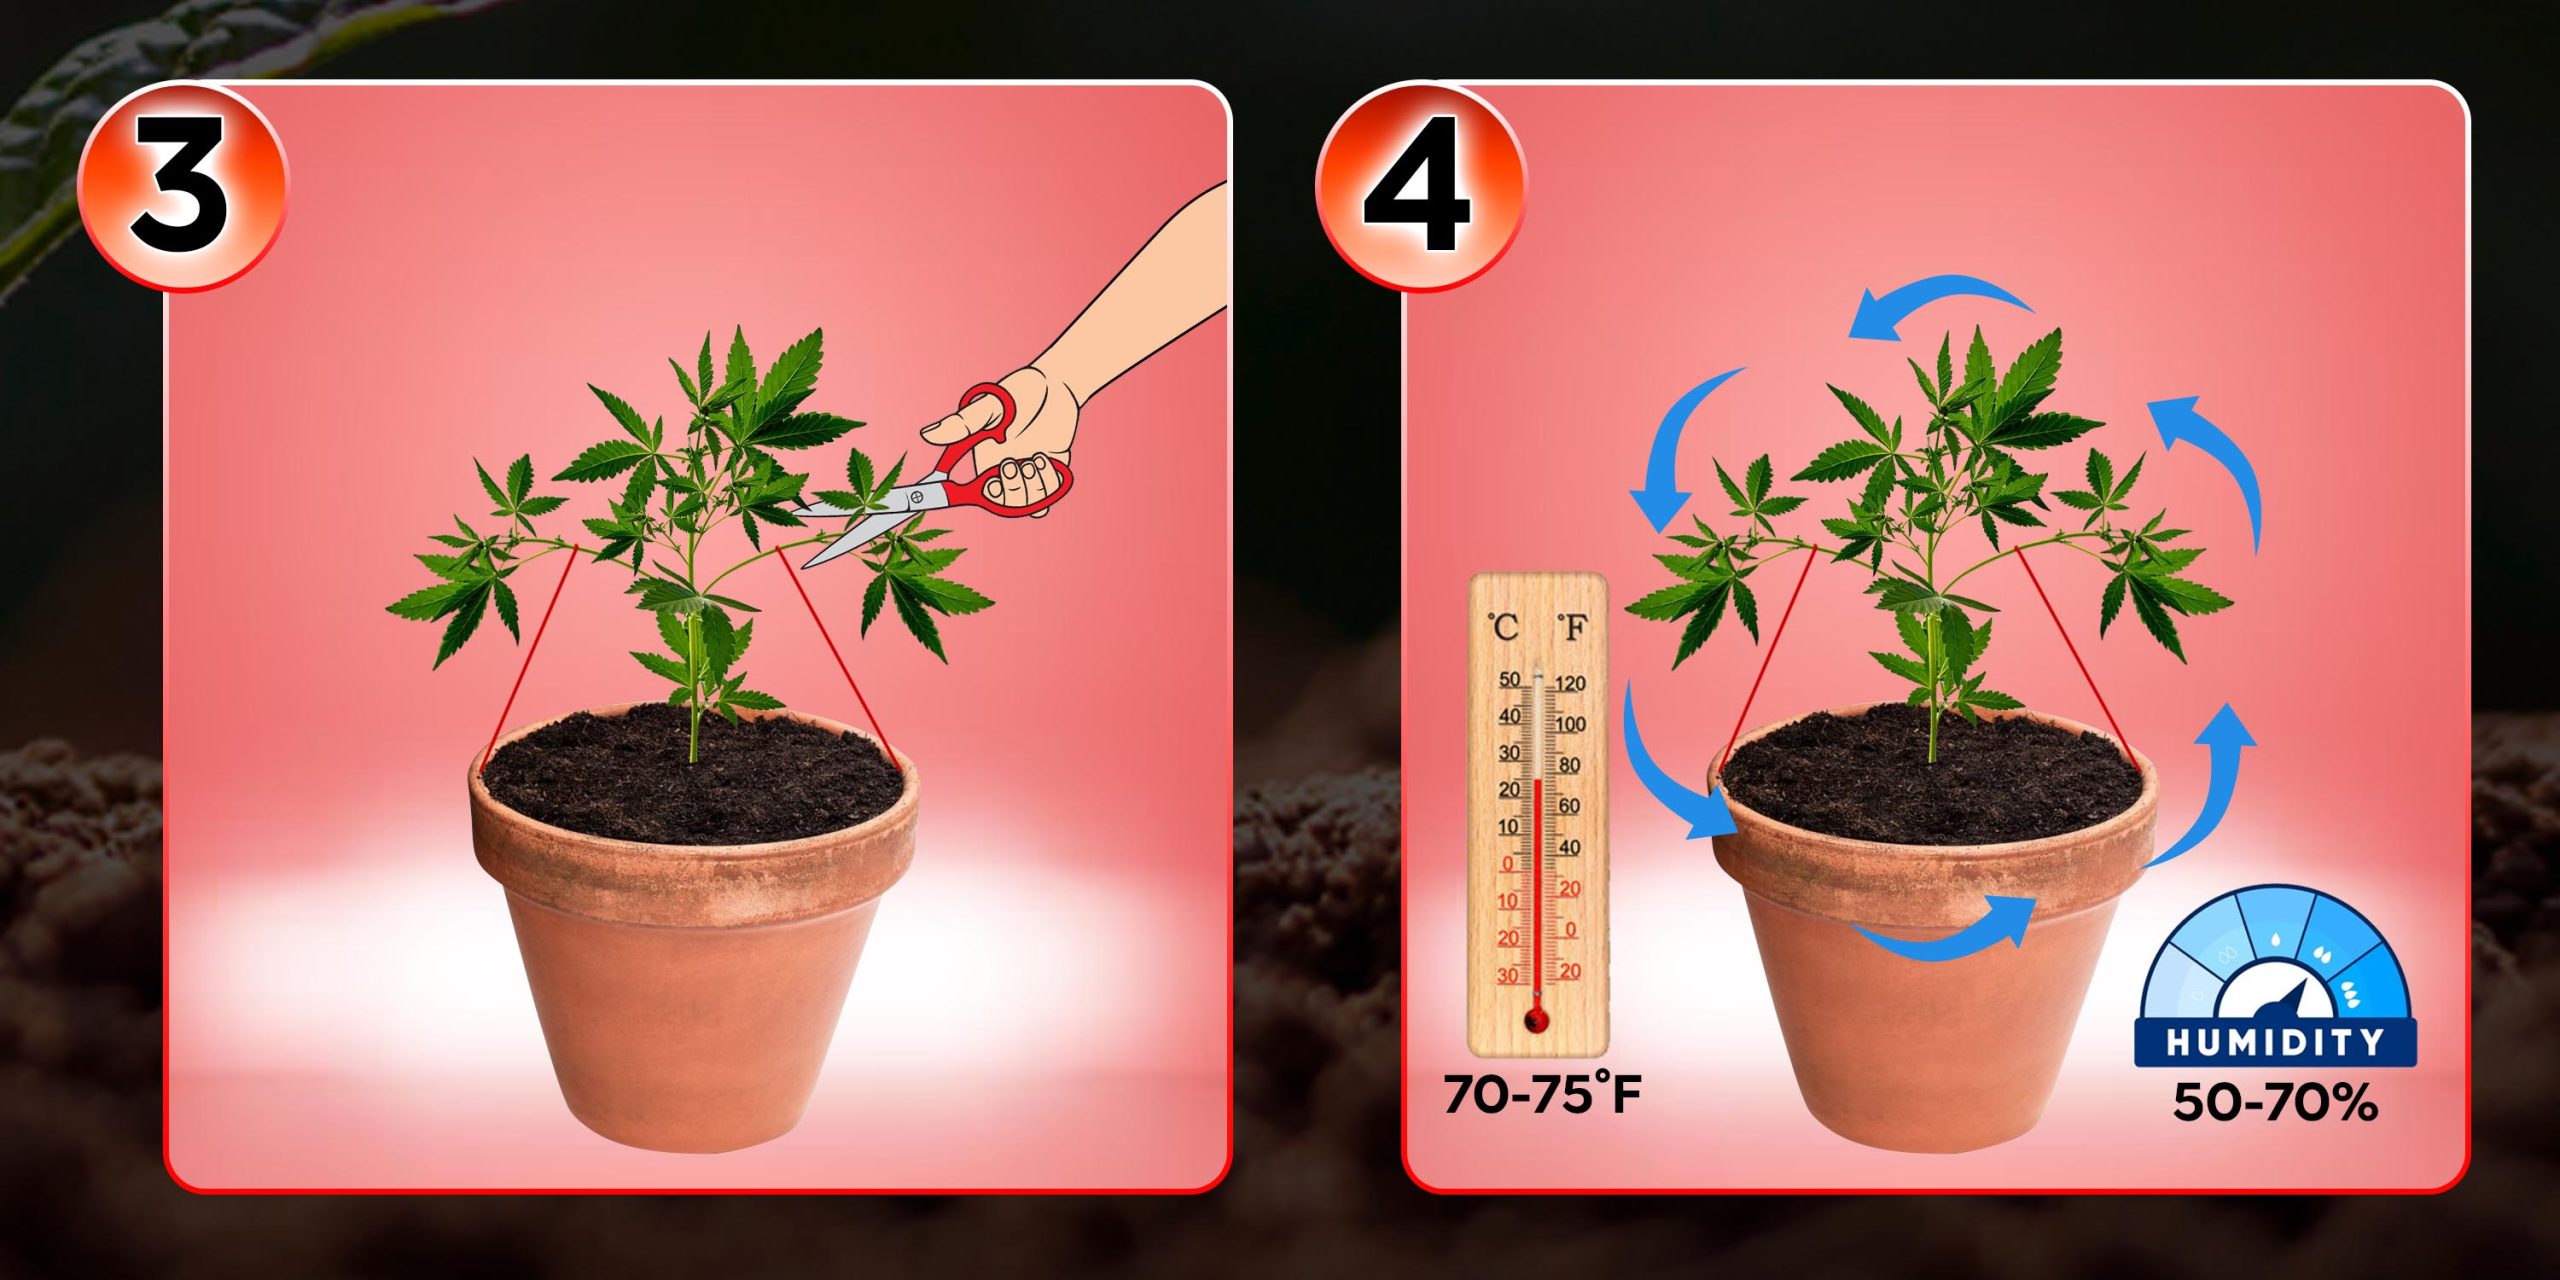
3. Train Your Plants
Low-Stress Training (LST): Gently bend and tie down branches to expose more bud sites to light.
Topping or FIMing: Cut the top of the plant to encourage bushier growth and higher yields.
4. Control the Environment
Temperature: 70-85°F (21-29°C).
Humidity: Reduce humidity to 50-70% during this phase to prevent mold.
Ensure good airflow to strengthen the plants and prevent pests.
Step 4: Flowering Stage
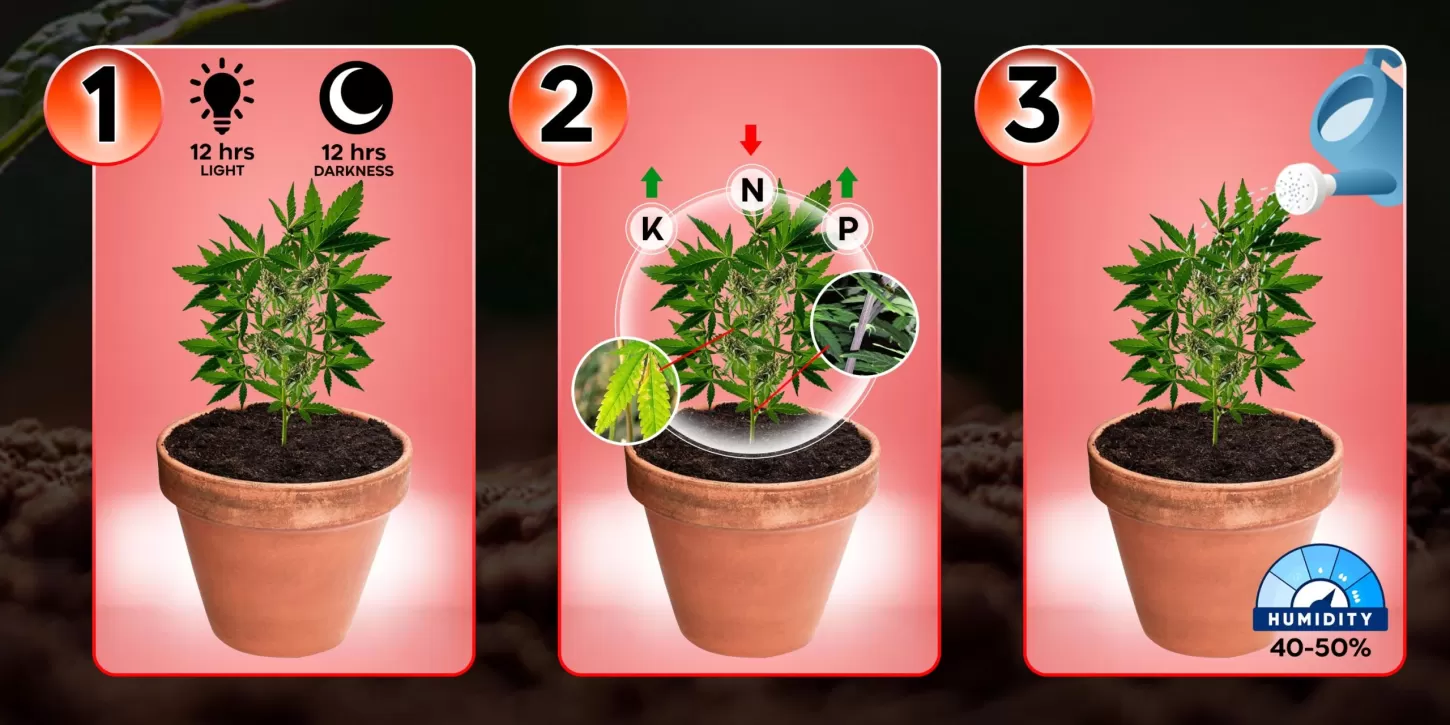
1. Adjust Light Cycle
Switch to a 12/12 light cycle (12 hours of light, 12 hours of complete darkness) to initiate flowering.
Keep light intensity strong, but avoid light leaks during the dark period, as this can stress the plants.
2. Modify Nutrients
Switch to a low-nitrogen, high-phosphorus, and potassium fertilizer to support bud formation.
Monitor plants for signs of nutrient deficiencies (yellowing leaves or purple stems).
3. Watering and Humidity
Water more frequently but avoid over-saturating the soil.
Decrease humidity to 40-50% to reduce the risk of mold in the dense buds.
4. Watch for Pests and Mold
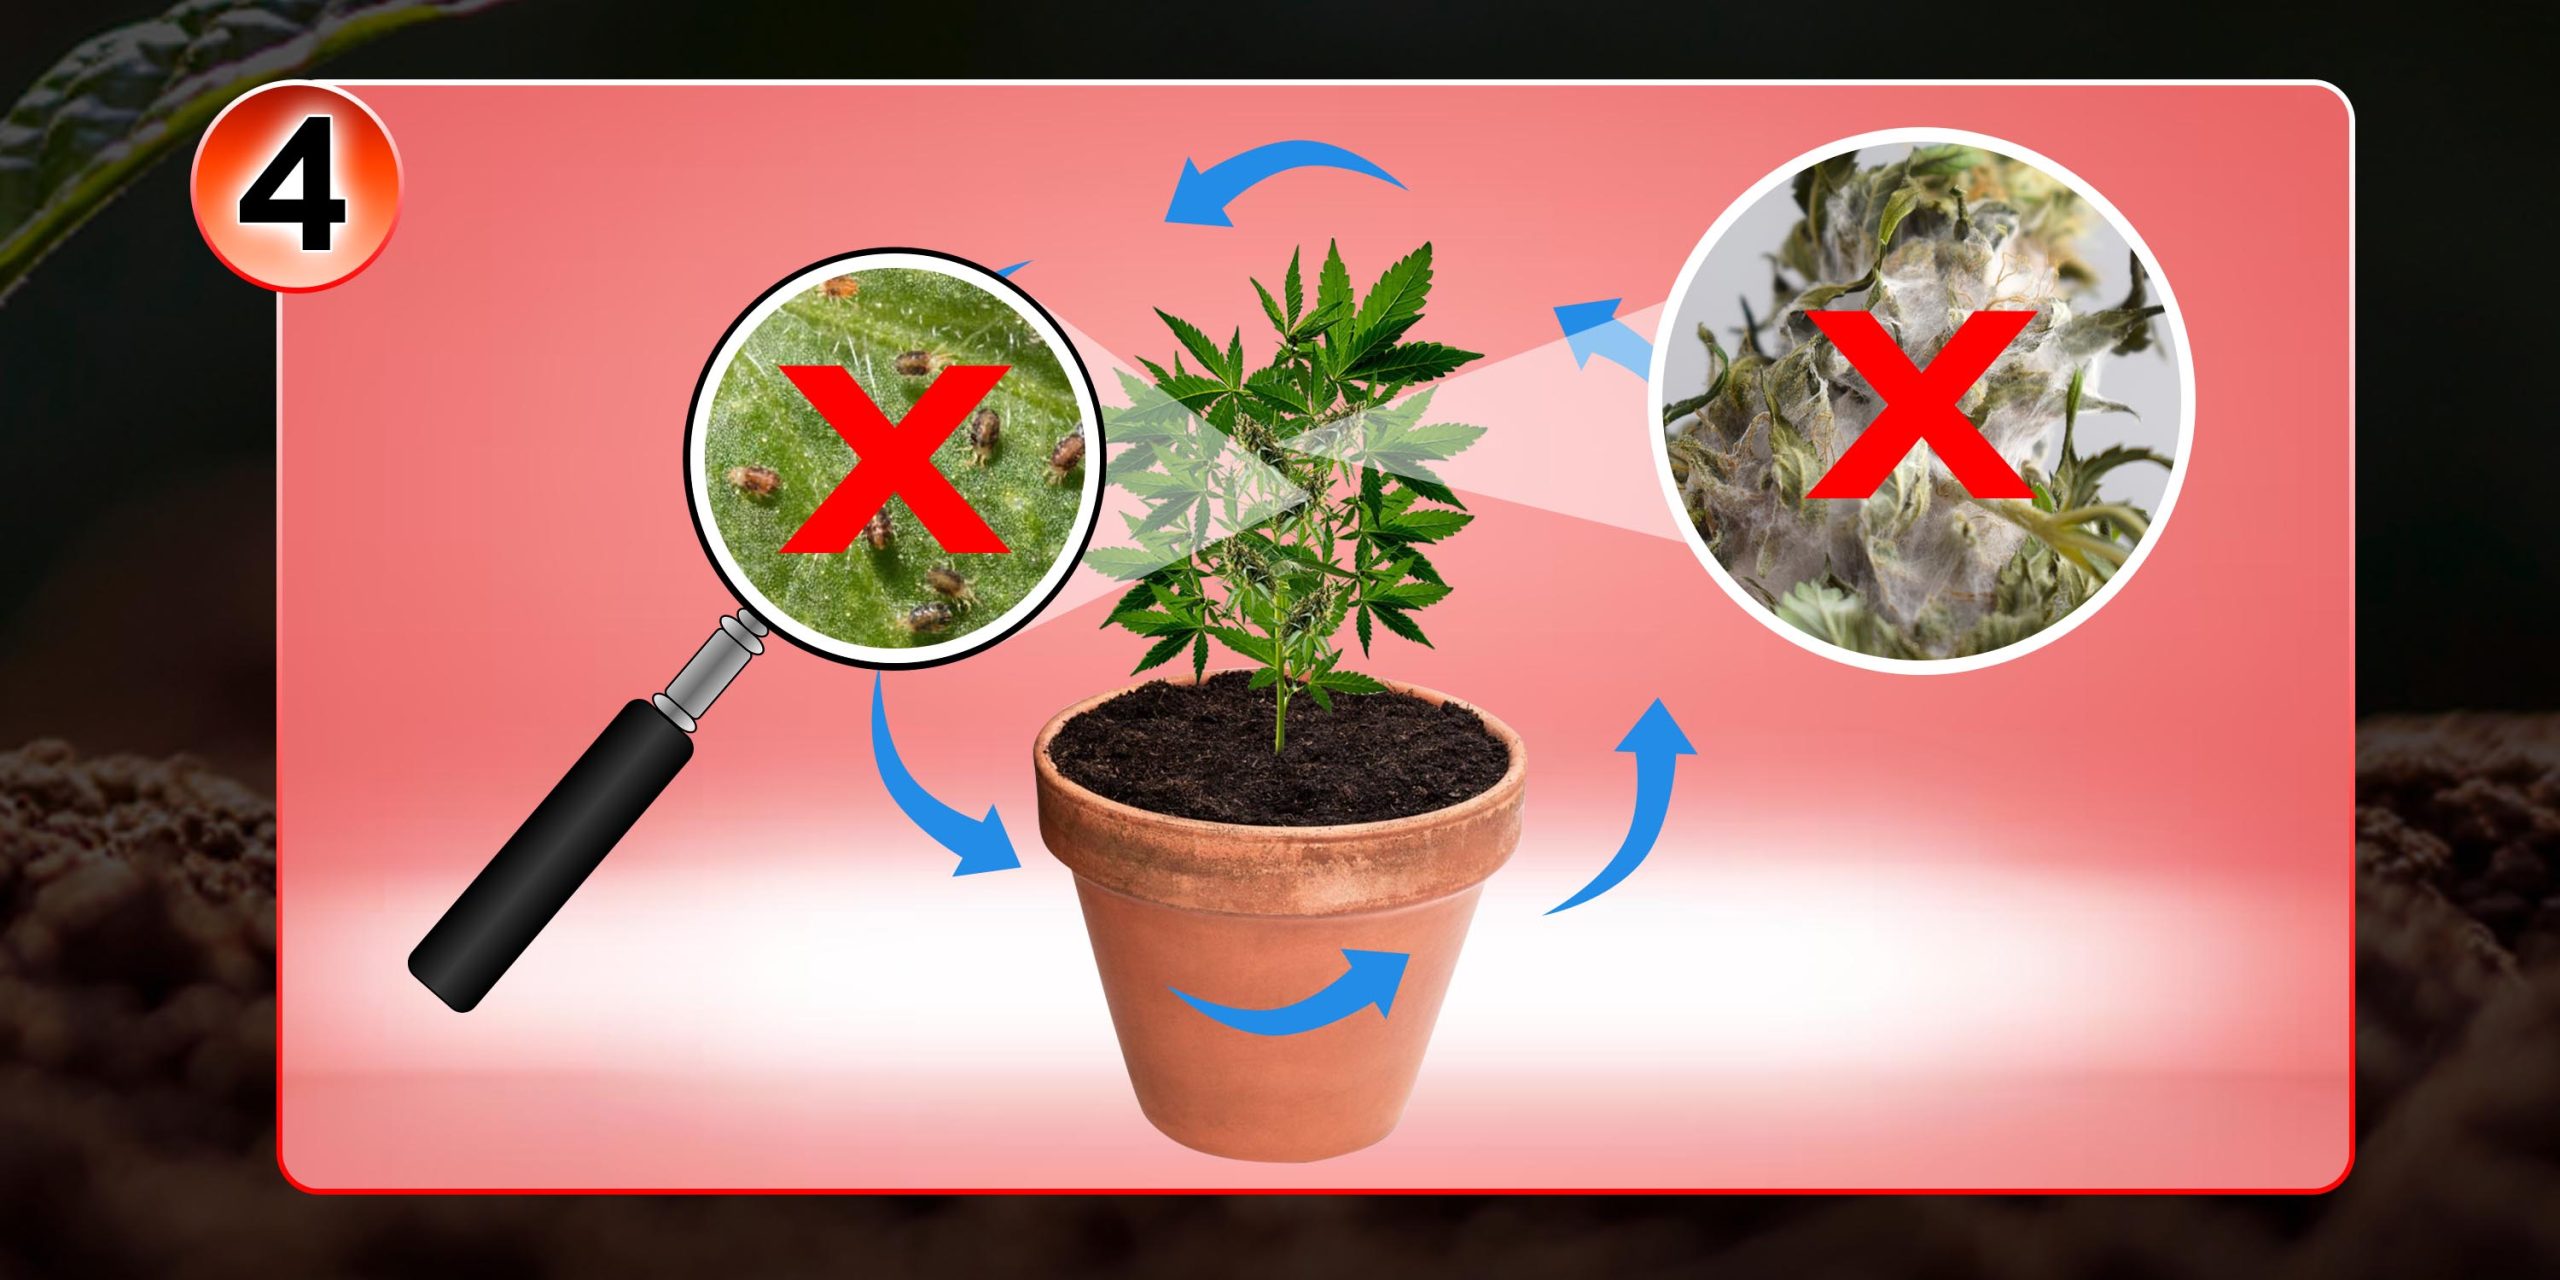
Regularly inspect plants for pests like spider mites or aphids.
Ensure good airflow to avoid moisture buildup and bud rot.
Step 5: Harvesting
1. Check Trichome and Pistil Maturity
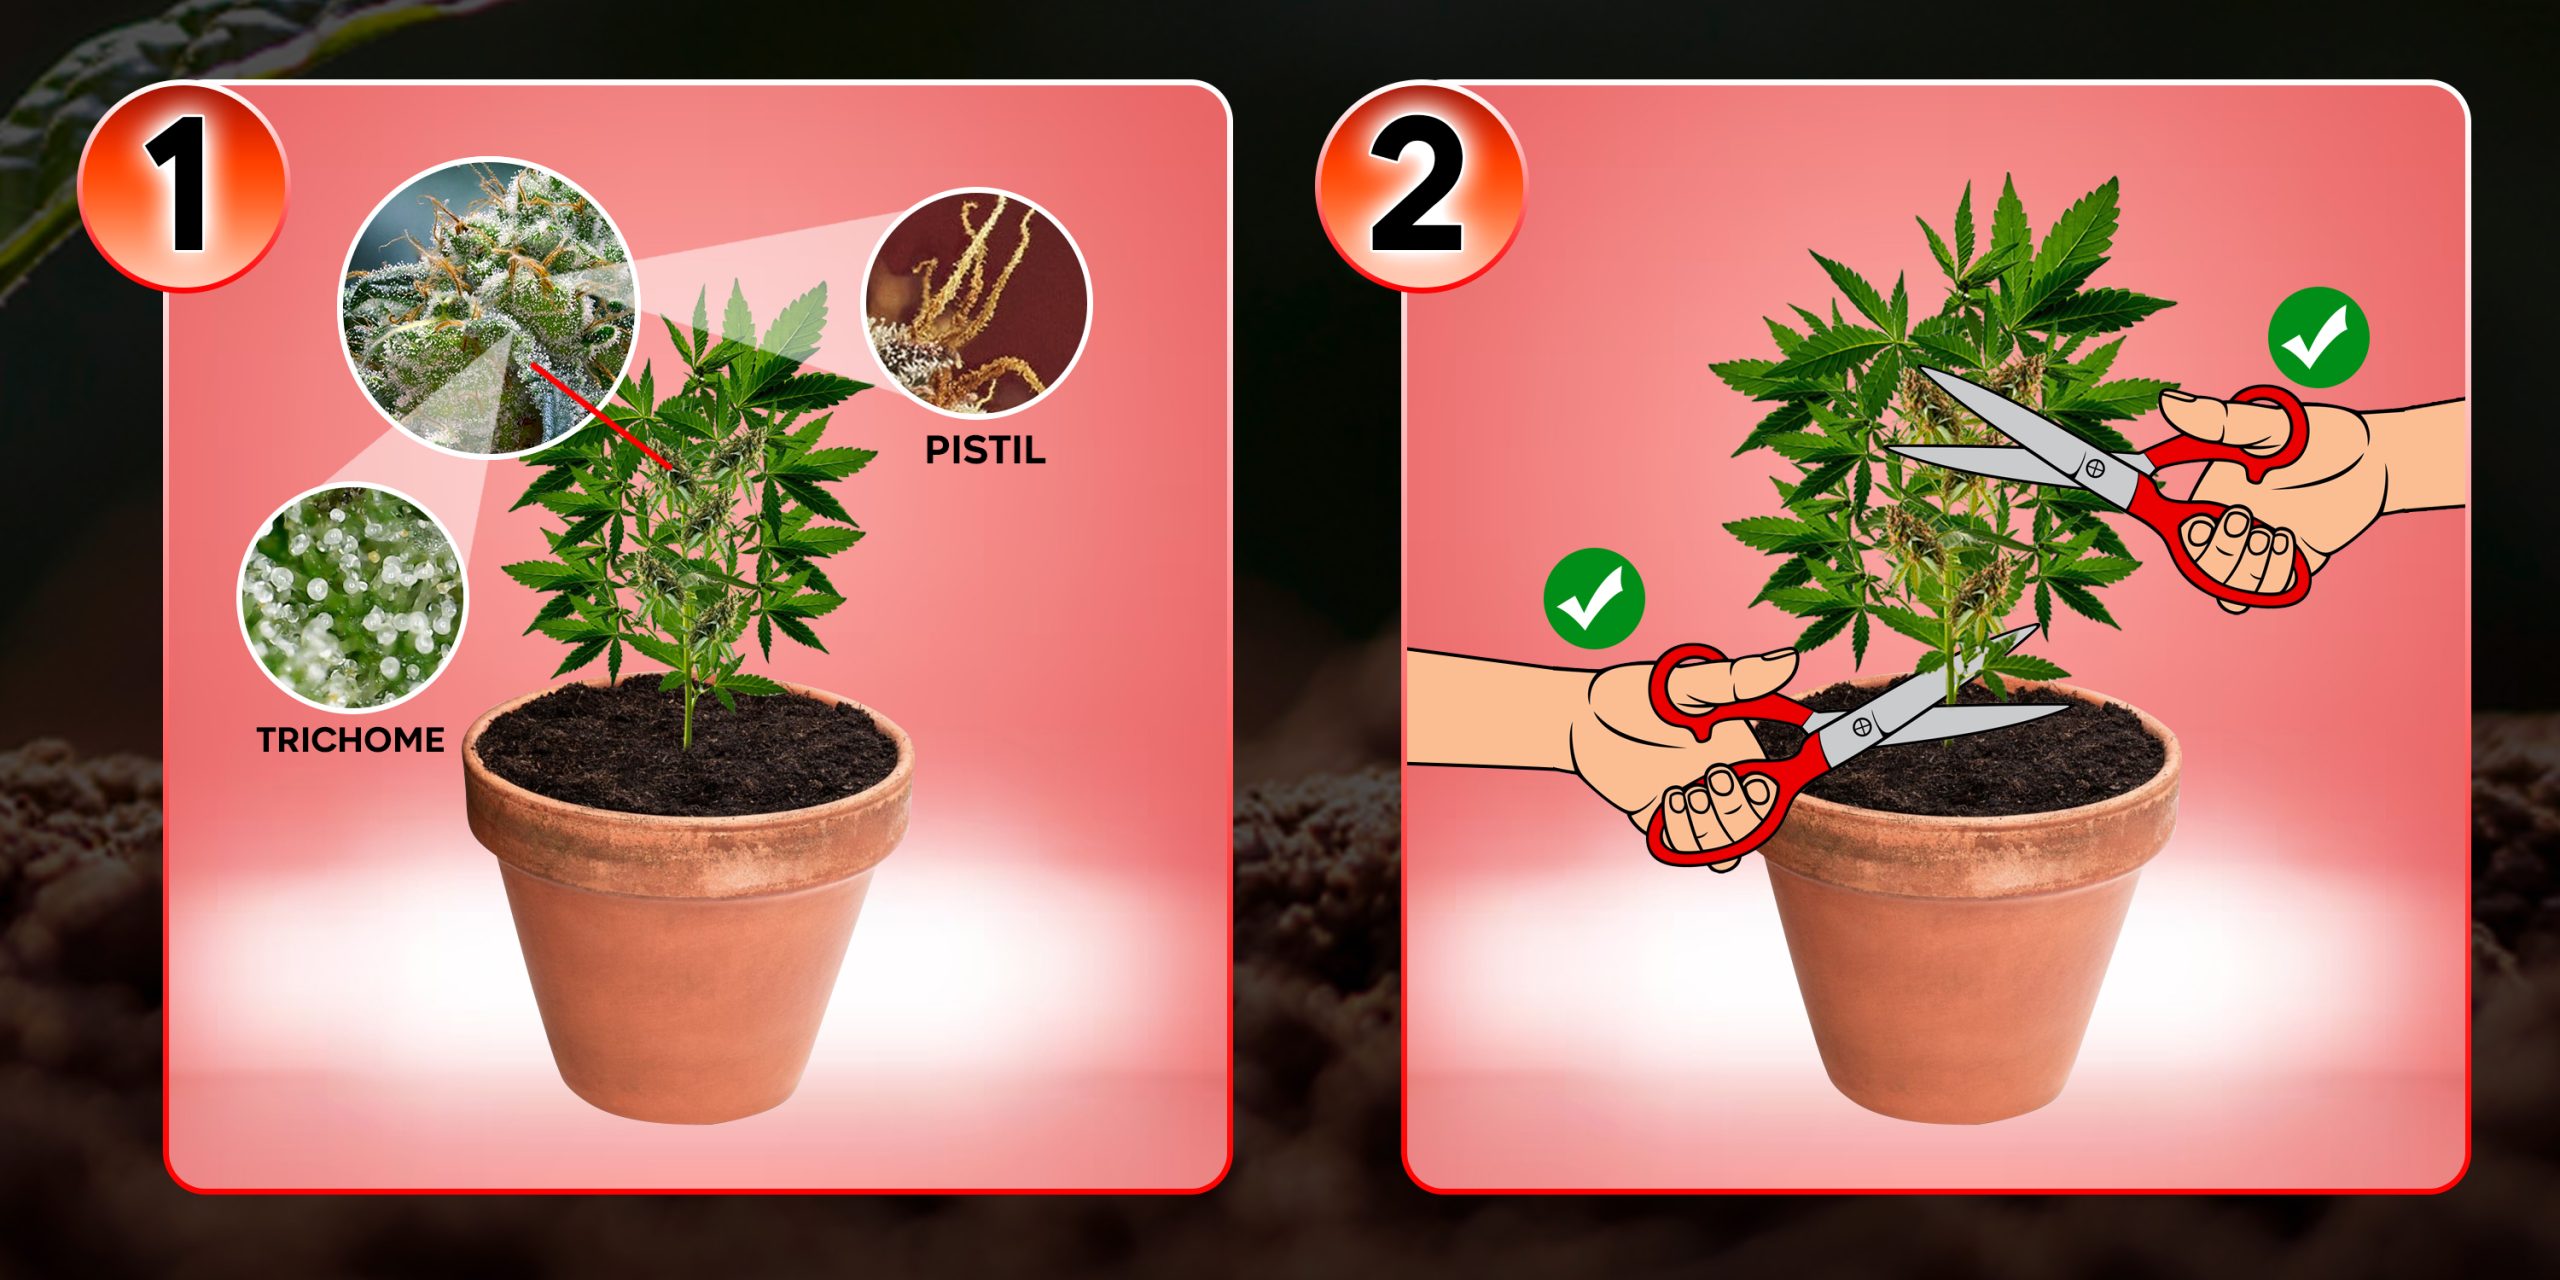
Use a magnifying glass to examine trichomes. Harvest when most trichomes are milky white, with a few turning amber.
Harvest when 70-90% of the pistils (small hairs on the buds) turn from white to orange or brown.
2. Harvest the Plant
You can either cut the entire plant at the base or harvest individual branches.
Remove large fan leaves before drying, or proceed with wet trimming.
Step 6: Drying and Curing
1. Dry the Buds Properly
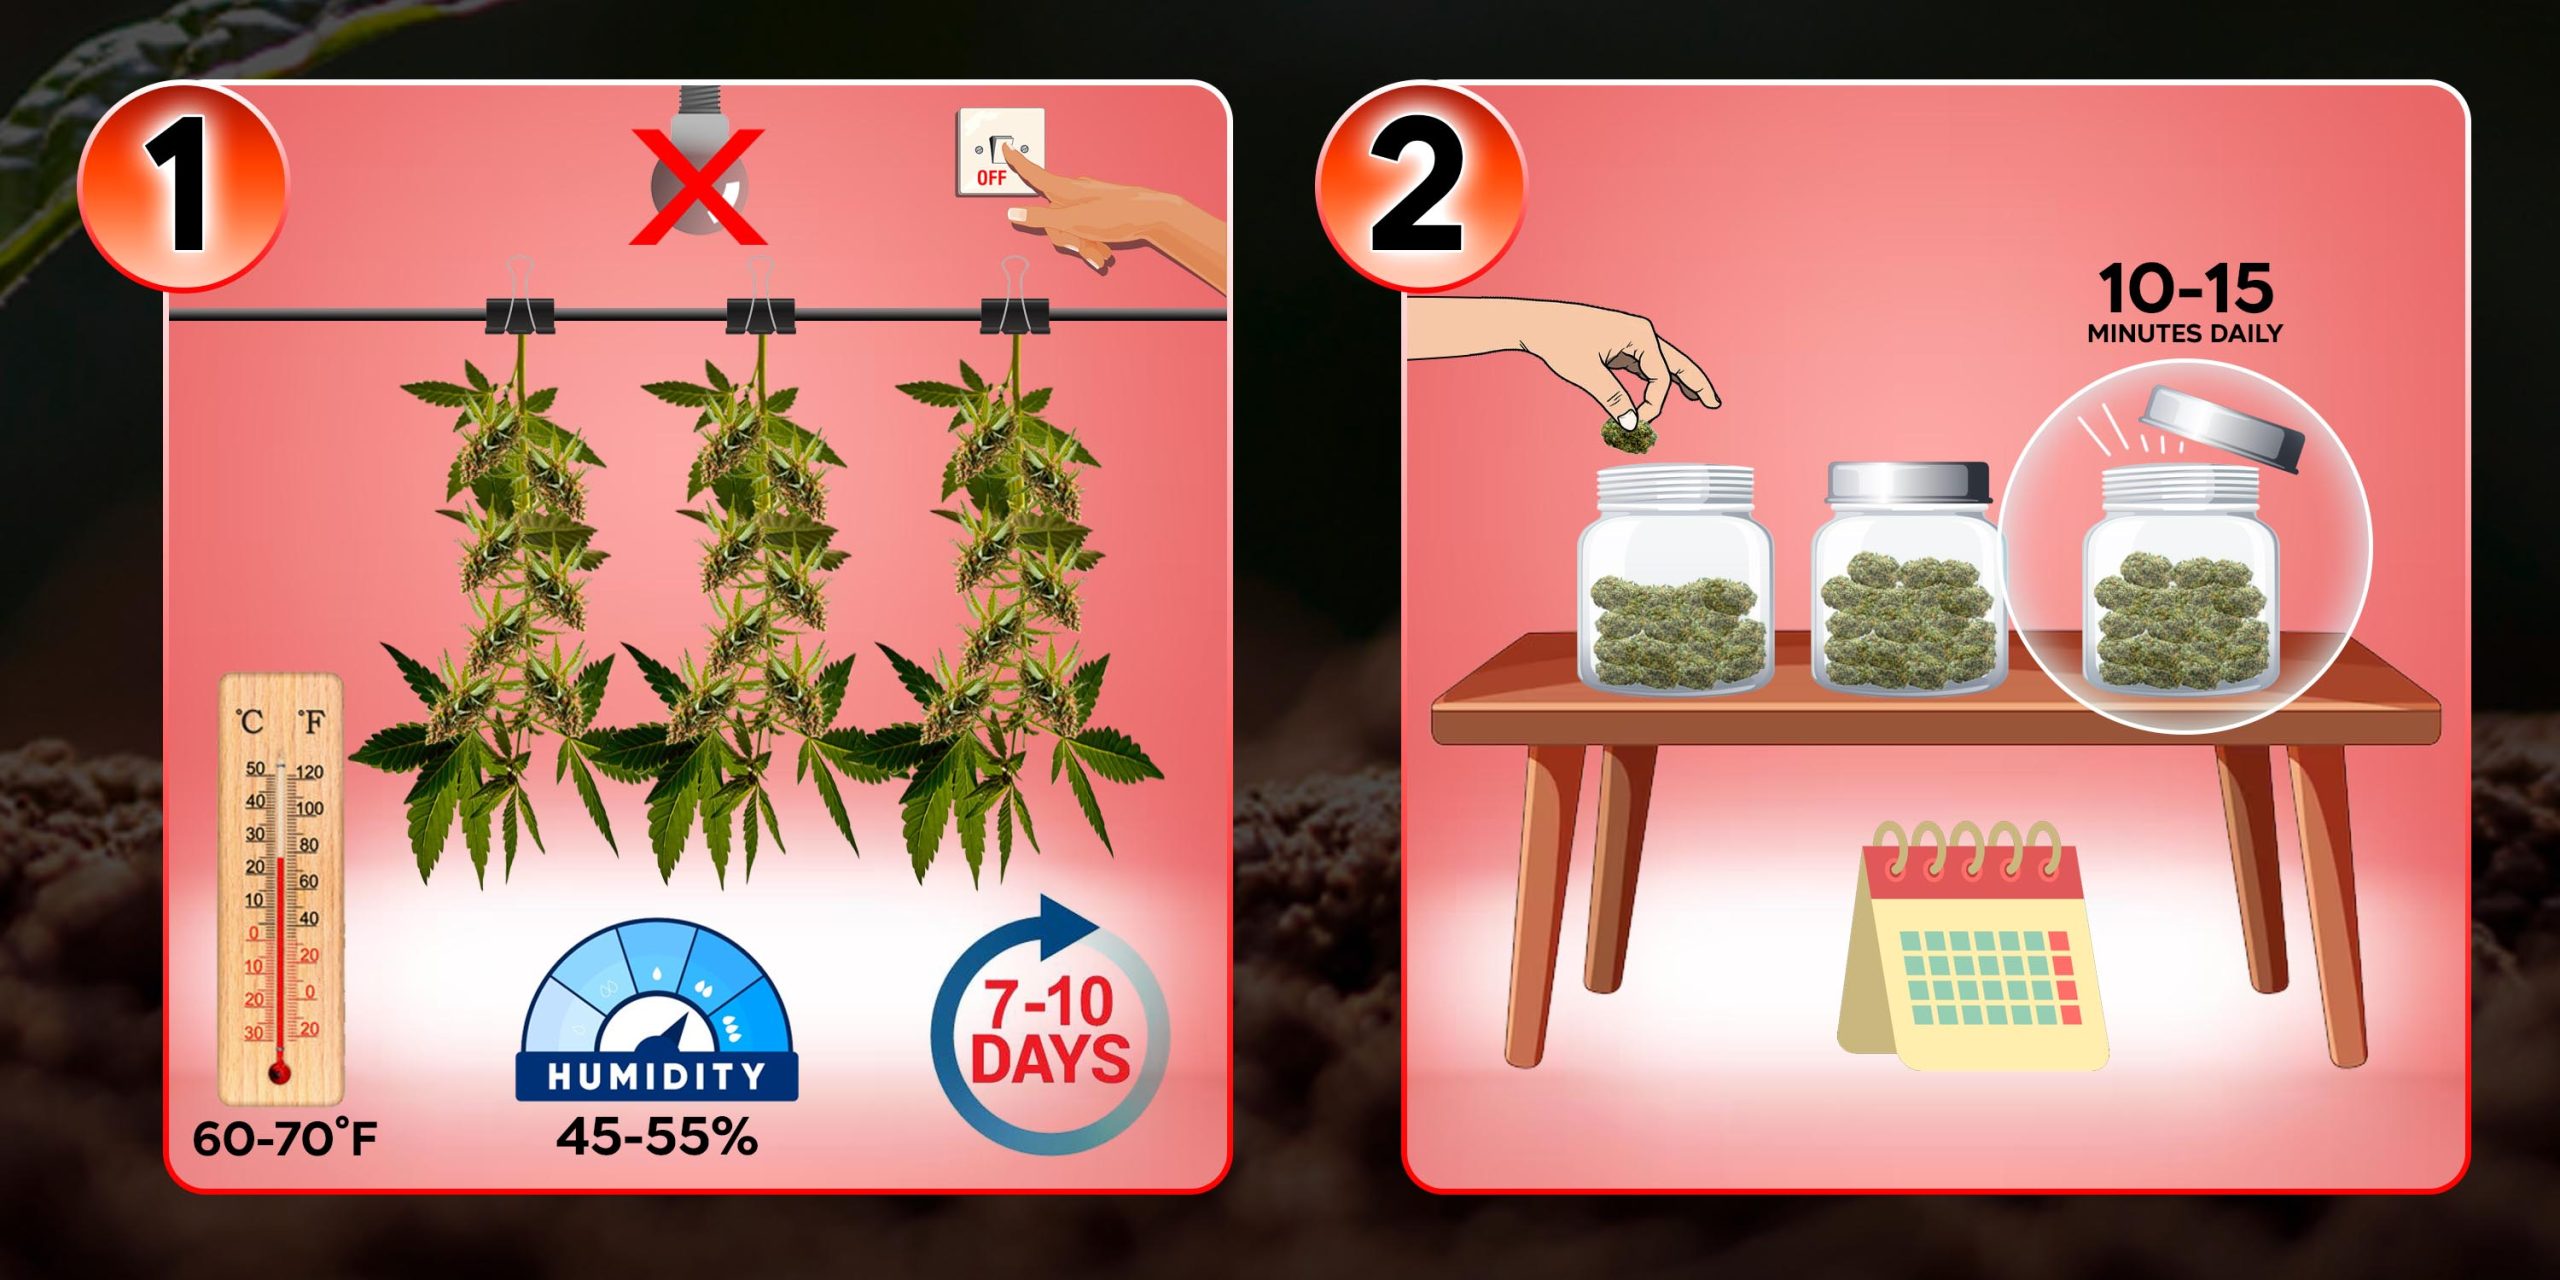
Hang the plant upside down or place buds on drying racks in a dark, well-ventilated space.
Maintain a temperature of 60-70°F (15-21°C) and humidity around 45-55%.
Drying usually takes 7-10 days. Buds are ready when small stems snap rather than bend.
2. Cure for Maximum Potency and Flavor
Place dried buds in airtight glass jars. Store them in a cool, dark place.
Open the jars (burp) for 10-15 minutes daily during the first week to release moisture.
Continue curing for 2-4 weeks for improved flavor and smoothness. For best results, cure for 6-8 weeks.
Indoor and Outdoor Cannabis Growing Guide
Indoor Cannabis Growing Guide
Outdoor Cannabis Growing Guide
If you prefer to grow cannabis in its natural habitat, our Outdoor Cannabis Growing Guide is perfect for you. Benefit from the full spectrum of natural sunlight for strong cannabis growth, be one with nature by saving electricity by growing outdoors and grow larger crops compared to indoor settings. Harness the power of the sun and the great outdoors to produce robust and healthy cannabis plants. We will also teach you the best locations for your outdoor cannabis garden, help you understand the weather and climate on how they affect your plants, get tips on soil quality and nutrients, learn insights on planting techniques on how they affect growing, and explore organic methods to protect your plants from pests. Download our outdoor cannabis growing guide here and get started today!


